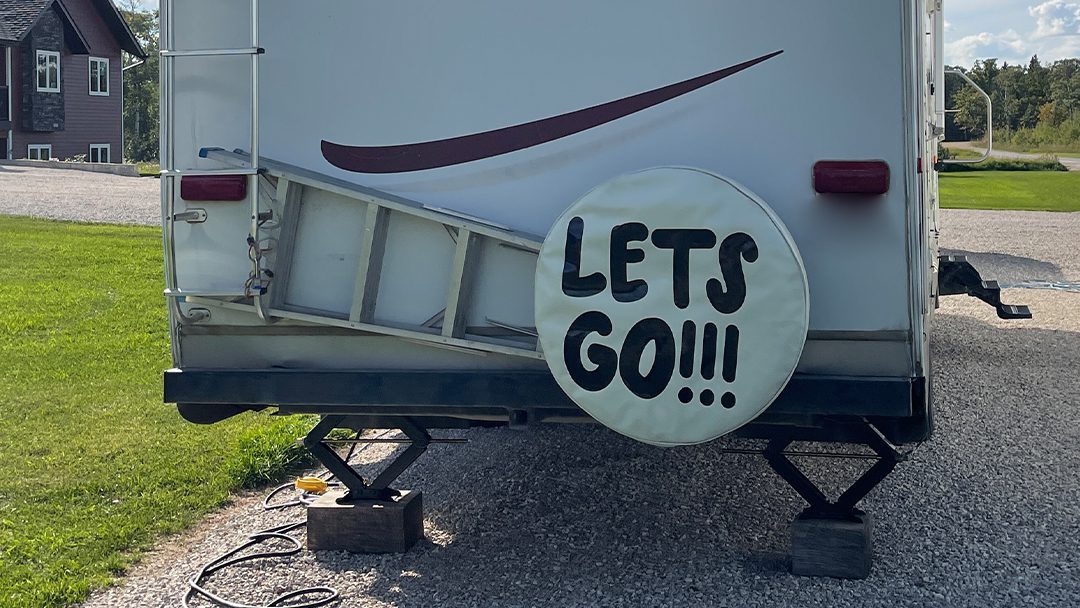
Today, we’re going to look at how to cover your leather RV spare tire cover. That’s a lot of words. Say that really fast. Three easy steps. This is how it’s done, guys, super easy to do. Whenever you get a spare tire on the back of your RV, very often it’s got your dealer information splashed across it or something generic like that. And we love our RV dealer. We go there all the time. But we do understand that, hey, we want to customize our RV spare tire cover because we want it to be unique and something else.
We looked online at all the different spare tire covers we can get. But there was nothing wrong with our spare tire cover. It was a beautiful leather cover. And we thought there’s got to be a way that we can do something with this spare tire cover.
This is what we ended up doing, and it turned out awesome.
So three steps.
You have to take your spare tire cover off and you have to wash it, do a thorough washing of it, and make sure it’s clean all the way around wherever you want to deal with it.
In our case, we did not focus on the outside because we weren’t changing the color that much, but on the inside, we made sure that that was completely clean and spotless.
We found this beautiful acrylic leather paint (Angelus Leather Paint – https://amzn.to/3ANfeRC ) and this stuff worked excellently.
I can’t speak on the wear and tear of it yet because we haven’t had it that long, but we have had it on the back of our RV for some time, and it hasn’t worn off yet. One thing to note, though, is when you are painting with leather paint like this, you have to paint very thin layers and do a lot of them.
So instead of putting a big thick blob on and going full out at the very beginning, at least go very thin, thinner than you want it to be. It probably took six or seven coats before the dealer logo started to disappear on the cover itself.
By the time we were done, we ended up with about 14 layers. On our last layer. We just sort of globed it on there, and that was a thicker layer. However, in the end, you could not see the dealer logo at all, and we had a blank canvas to start with.
You could go ahead and you could paint. You could get some more colors of this paint. And if you’re good at painting. I am terrible at painting. So I wasn’t about to paint. I did think about it.
Well, we ended up doing as we ended up going and getting another vinyl decal made.
So this is the trick with the decal. It turns out a little bit shiny, but you have to apply some heat both to the cover and also to the decal as you’re putting it on. And then that way it’ll cause it to mold a little bit more, won’t be quite so rigid. The two of them will bond a lot better than they previously would in the end.
Love to hear your comments below. If you have any questions, I’d love to help you out.


Over the years we have done a lot of stupid things. Mistakes happen. However, sometimes there are mistakes that happen that you cannot be prepared

RV decals can be annoying. Sometimes you want a clean slate and other times you simply want to remove all that annoying dealer stickers. In

When the weather gets cold and temperatures dip below freezing you have to take steps to protect your RV. Ensuring that you properly winterize my

Today, we’re doing something weird and strange. We’re sick of the way that our rims look, they look rusty. And I’m sure you could do